I’m a true believer in using electrolysis to remove rust, particularly for items that have a lot of cracks and crevices, such as fuel tanks.
This article was written several years ago for a popular vintage motorcycle site, and I thought it might be of broader interest. Much of this content is available elsewhere on the web, this is simply my take on the process.
Original Article Begins Below this Line…………………………………………………………………..
Below are several photos from my current project. The first shows the process after about 54 hours. I expect the process is about complete, but I cleaned the anode and am continuing the process for another 24 hours to ensure it’s done.
The second photo shows the basic equipment; a battery charger, the (freshly cleaned) anode and the mix for the electrolyte. The Arm & Hammer product wasn’t particularly easy to find, but I eventually tracked it down at a very large mega-superstore (Meijer). It’s cheap so I bought two boxes – just to be sure I have a future supply.
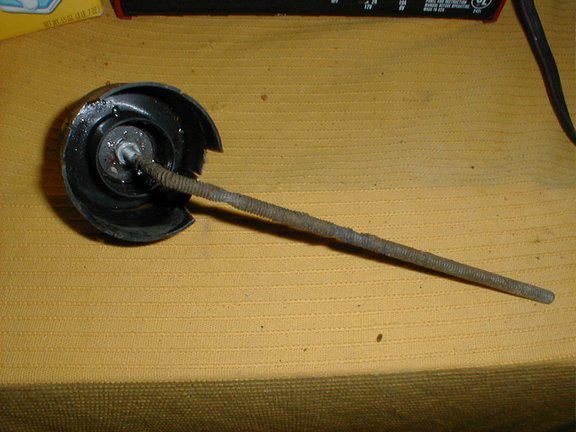
The anode is simply a piece of ¼ inch threaded rod (zinc plated) that I bent into shape to fit into the tank WITHOUT touching the sides (most important!). Note that the anode doesn’t have to be plated, any cheap steel will do. I simply had this rod around so I used it. Note the threading was an advantage as I could use nuts to mount the rod to the plastic cap.
The positive clamp from the charger goes to the anode, the negative to the item to be cleaned, in this case, the tank itself. To connect to the tank, I first measure the inside diameter of the petcock opening – about .600 if memory serves. I picked up a rubber “cork” at Lowes that was about this .600 size in the middle of the cork taper. I pushed the rubber cork/plug into the petcock opening, good and tight. Of course the tank has to be sealed before the electrolyte is added.
Using the nut that connects the petcock to the tank, I spun this nut onto the petcock threads, which was a perfect fit over the top of the rubber plug. Over the outside of this nut I placed a worm-clamp, inserting a piece of wire with the last inch or so stripped, under the clamp. When the clamp is tightened, the wire would be trapped between the worm-clamp and the large petcock nut. The other end of this wire is where the GROUND from the battery charger is connected to. If you look carefully in the last photo, you can see the ground wire/clamp on the left side. Note that the reason I used a worm-clamp over the top of the nut versus putting the clamp directly on the petcock mounting threads is I didn’t want to damage the petcock mounting threads in any way. The nut is designed to mount to these threads and protects them this way.
When turning on the charger I use the 12v, 10 amp setting. The charger started out at the high end of the scale, but quickly dropped to a low current flow. The last photo shows the setup/hookup.
I took a plastic paint can cap, and cut a hole in the middle using a hobby knife. The anode is mounted with washers and nuts on the top and bottom, to make sure it doesn’t shift at all. Look carefully at the cleaned anode, you can see where it’s been worn away… that’s why it’s called “sacrificial”…
Note that when you’re done, the steel inside the tank is raw and unprotected, and once the tank is rinsed out, it will tend to start rusting again. My coating of choice is POR-15, but that’s a personal matter.
on the post it stated ” If you look carefully in the last photo, you can see the ground wire/clamp on the left side”
However, there is no picture present – also what ratio do mix the Super washing Soda to water?
Great write up – I can’t wait to try this method on my rusty tank
Thank you!
Hmm, I just checked the posted write-up and it has five or six photos after the body of the text (I’m viewing from a desktop PC). If you are viewing from another device, such as a phone, that might be the issue.
In terms of the washing soda mixing ratio, it doesn’t take much. About one cup of washing soda to five gallons of clean water works fine for me. Reduce or add soda proportionally to suit the quantity of solution you are intending to mix.
If you try this method, let me know how it goes for you…