This is a relatively rare motorcycle – a first-year KZ650C1, which is unique in the fact it has a factory standard disc brake on the rear, in addition to the front disc. The bike is in good shape for it’s age and had been sitting for some time when I picked it up a couple of years ago. I got it running by cleaning the carburetors, re-shimming the valves, flushing the brake lines and replacing the brake fluid.
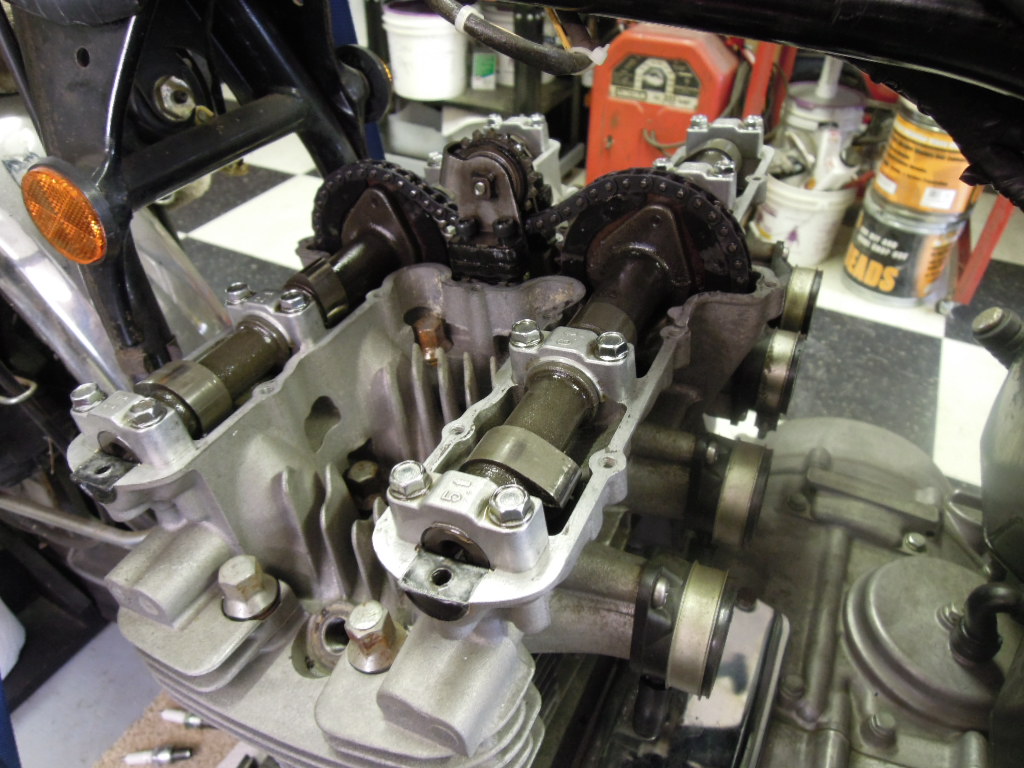
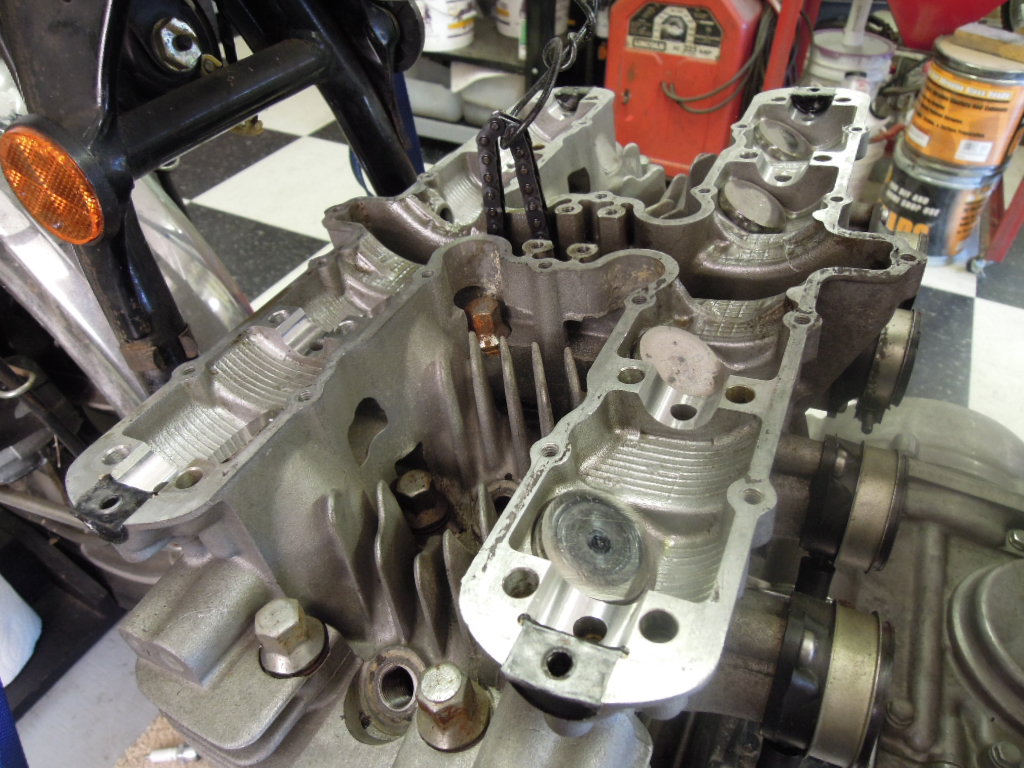
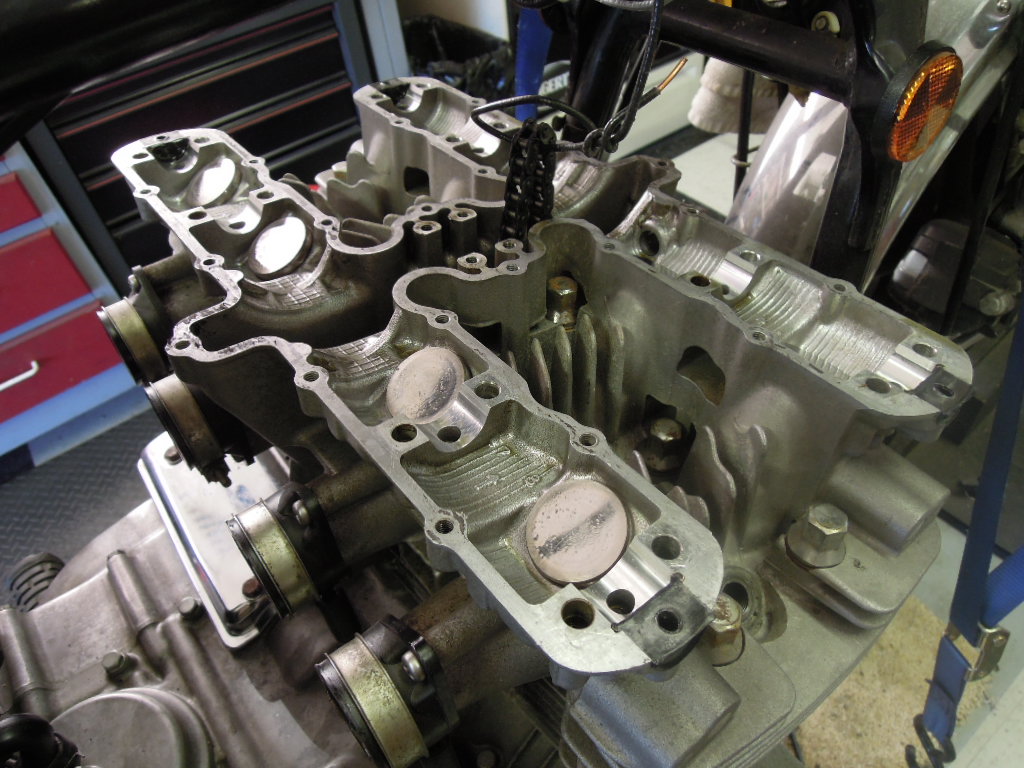
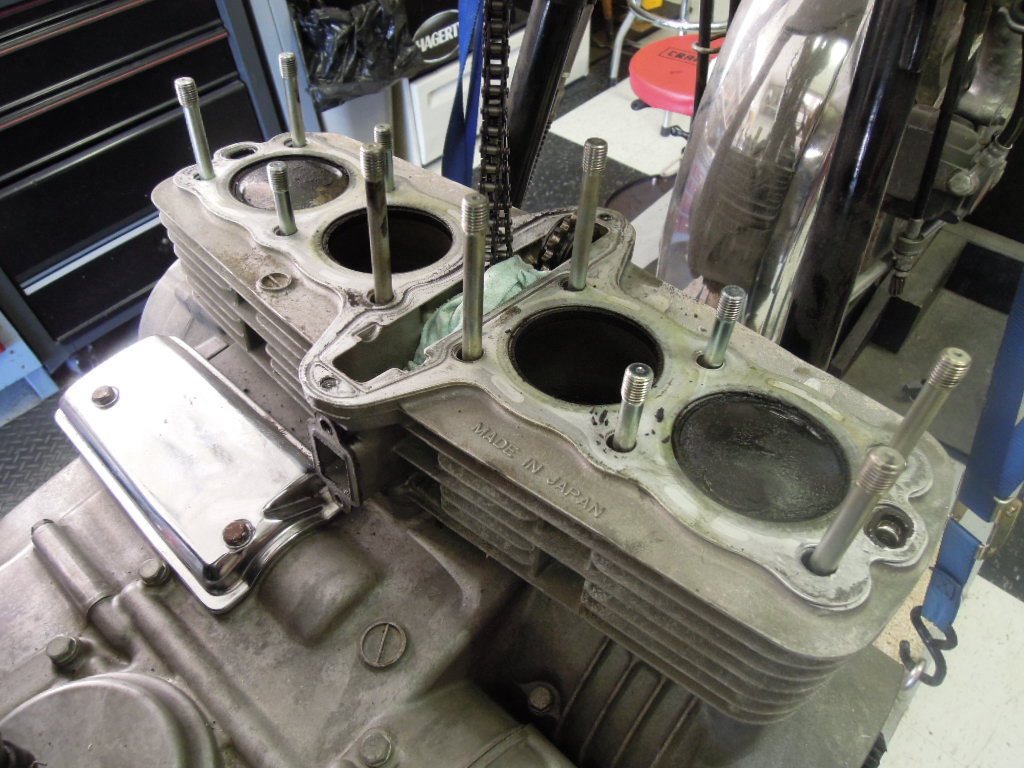
However, the engine was always a hard starter when cold, a symptom I usually equate with low compression. I did a compression test and sure enough, two cylinders indicated very low compression. Through using a couple of simple techniques, I deduced there were valve issues, though I didn’t rule out sticky or stuck rings. Therefore, a dive into the top end was called for. This is a double overhead chain-driven cam unit, so it’s a relatively complicated design. After removing the head I did a leak-down test on the valves and discovered cylinders #1 and #3 both had least one leaking valve. The one photo below shows the two combustion chambers with the problem children circled in red. The other photos show the variouis stanges of of top-end tear down.
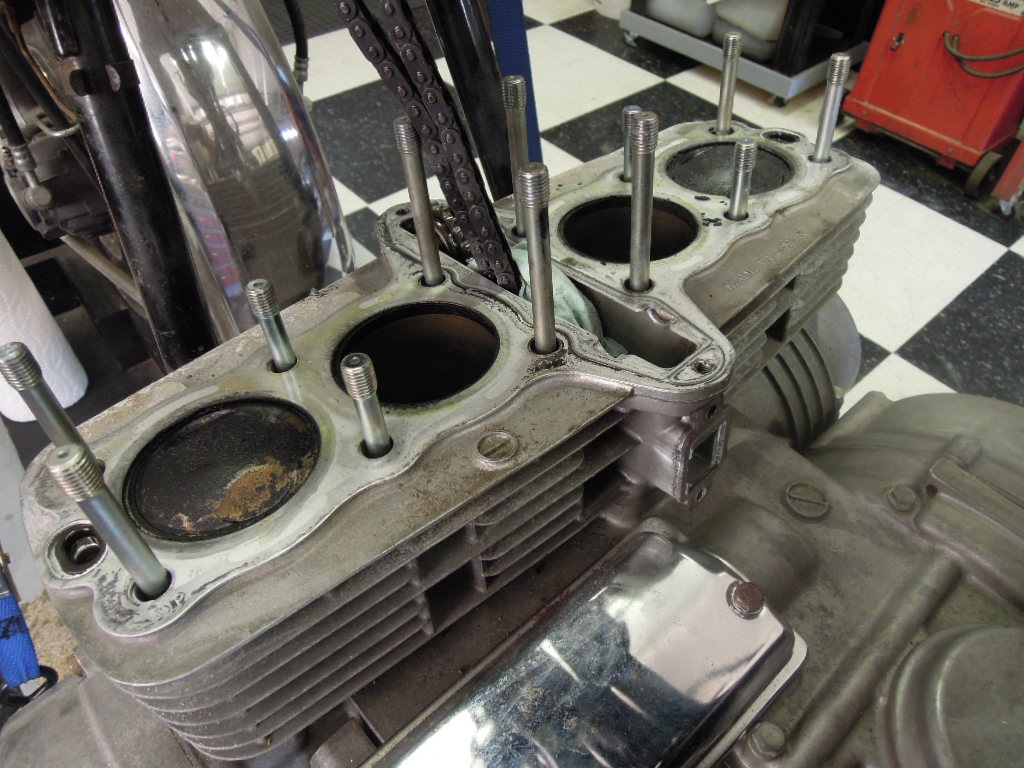
I also removed the cylinder, which is cast as one unit, as I wanted to check the condition of the rings. Though none of them were actually stuck in the classic sense, virtually all of them required a good cleaning, including the ring grooves as everything was covered with carbon. In fact, the entire top end including the valves and the pistons were coated with thick black carbon. Clearly, this engine was running rich which will lead me back to the carburetors and probably the jetting before it’s over.
In another post I’ll detail what I’m doing with the pistons and cylinders and will include more photos of those components.
Remember, you can click on any photo to enlarge it.


Ray, I just located your blog. I recently was given a ’77 KZ650B1 (I think that is what the engine is). The front brake is frozen, the engine entirely disassembled. The previous owner unfortunately left the engine boxes in the back of his truck for about a month in Seattle. So I am finding rust on the cam shaft and lobes, one of the pistons, etc. I have never even tried to put an engine, or complete resto on a bike, together before. So finding your 4 part discussion on the engine top end will at least give me an idea of what I am up against. Thanks so much for doing all the hard work of filming, editing, and putting it all up here!
Dale
Thanks for the note Dale. Clearly I’m not doing as much work as you have in front of you, but I know what you’re facing as I’ve done similar projects… just not with a KZ650. I’m not an expert on this particular motorcycle but I have lot of general wrenching experience so if I can be of any help, please feel free to ask. I’ll do what I can or direct you to other resources that may be useful.
If you haven’t been there already I’d highly recommend you visit the KZ650 forum at:
http://forums.kz650.info
Hi,
Nice quality blog/videos.
My son and I just removed the top end off his 79 kz650 as one of the cylinders had 0 compression. This series is going to be super helpful going back together. How did you clean the carbon off the pistons so well? Any suggestions on removing the pistons to clean them? We could just use the directions in the manual.
Thanks,
Ben
Thanks for the comments and kind words.
To answer your specific question about cleaning the piston crowns, I use a Dremel tool with a brass wire wheel (brush). You can use a steel wheel/brush but need to use care and not be too aggressive as the pistons are aluminum. Wear safety glasses, goggles or a full face shield as the spinning wheel will throw wires from the brush. Make sure you stuff the crank mouth openings with clean rags or towels to prevent wires or contamination from getting into the bottom end if you clean the pistons in-place.
Also, I avoid removing pistons unless I have a specific reason to do so as I try to minimize the opportunity to introduce other issues. That doesn’t mean I won’t remove them, but only do so if really necessary.
Hi Do you have any footage of you doing the disassembly of the kz650 top end?
No, I didn’t begin to shoot video until the engine was apart. Sorry…
Hi, I have this exact same motorcycle, KZ650 C. Would you consider restoring another one? I would haul this bike across the country for the privilege of having you restore my bike. You take sure great care in what you do and are meticulous. This is a serious request. Email me for me to exchange phone numbers if you are interested. Currently I am forced to ride a lowly 2008 Kawasaki Vulcan 900 until I find someone who can help me restore my baby. ha!
I stumbled across your top end reassembly videos and was pleased with the effort you put into the production of the videos. These videos have been monumentally helpful to me. I’ve never removed a Kawasaki Cylinder Head and had no idea what to expect. After watching your video, I feel that I can do the job with confidence. I own a 1979 KZ650 B3 I bought new. I was hit by a car in 1981 and stopped riding for years. In 2006 I began restoration of the bike. today she is fully functional. I have a little experience working on the bike, but engine work is new to me. Thanks again for the effort, and great detail you put into the videos.
A sincere thank you for the kind comments, and it’s certainly great to know that the videos and effort are useful and appreciated. I’m happy to hear that you are back on a bike and involved with a vintage bike.
Thanks again!